Summary: Cold waxing is a trending method to remove unwanted hair at home with ease. This article highlights every detail related to this process.
Cold waxing hair removal method is getting popular day by day because it lets you perform the treatment at home. If you have a date tonight and want to get rid of unwanted hair, cold waxing is a great home treatment.
This technique uses cold waxing strips that you need to stick to the skin for a while. It works like a charm. The main benefit of this technique is that it’s so convenient and simple and anyone can do cold wax hair removal at home. But you will have difficulties in getting rid of coarse or thick hair with the cold wax hair removal technique.
Table of Contents:
- Part 1: What Is Cold Wax Hair Removal?
- Part 2: Advantages of Cold Wax Hair Removal
- Part 3: Cold Wax or Hot Wax for Hair Removal?
- Part 4: How to Use Cold Wax for Hair Removal?
- Part 5: Tips for a Successful Cold Waxing Experience
Part 1: What Is Cold Wax Hair Removal?
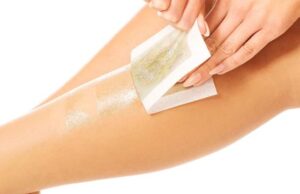
In the cold waxing technique, you need to use pre-made wax strips on your skin. You just need to put it on the treatment area and leave it for a while. This technique is called the cold wax hair removal process, because you don’t have to heat up the wax strips. It’s a very quick and convenient way to get rid of unwanted hair.
Cold wax hair removal strips use several ingredients below that help remove hair efficiently:
- Natural or synthetic resins like colophonium.
- Mineral oils and/or vegetable oils like sunflower or soybean oil and glycerin.
- Emollients like shea butter, cocoa butter, and/or lanolin.
- Stabilizing agents to improve the strips’ shelf life.
- Fragrances to leave an aromatic effect on the skin.
How Cold Waxing Works?
Here’s a brief of how cold wax adheres to the hair and removes it from the root:
1. Adhesive Properties
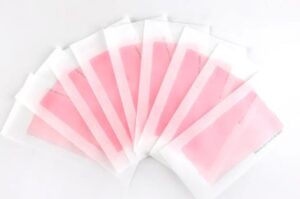
Cold waxing strips have resin and adhesive on their surface. When you apply the strip to the skin, the adhesive sticks nice and tight to the hair and creates a strong bond and grip.
2. Application
After sticking the strip to the skin, the cold wax is applied. The wax gets stuck well to the skin and hair since it has a sticky nature.
3. Pulling Action
When the strip gets pulled out, it pulls the hair to its root. To get the best results, it’s important to pull the strip quickly instead of peeling it. The upward force creates a massive tension on the hair that results in uprooting.
Part 2: Advantages of Cold Wax Hair Removal
Super Convenience
The cold wax strips are pre-made, ready for use. There’s no need for any special equipment. Just wash the area before using the strips. No need for heating and you can do it yourself conveniently at your home.
Quick Working
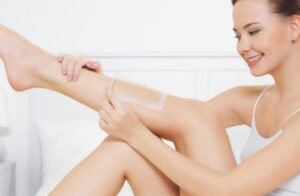
Cold waxing is indeed one of the quickest hair removal treatments, which is best for busy people who have limited time.
No Mess
Warm waxing can be a little messy as you have to heat up the wax and then clean it up. But with the cold waxing strips, there’s literally no mess in the process. Just pull the strips and dispose of them. Simple!
No Burns
There’s literally no risk of burns and cuts in the process. There’s nothing warm or hot involved in the process, so it’s very safe to use the cold wax strips.
Great for sensitive skin
Those with sensitive skin might feel discomfort in hot waxing or other hair removal treatments. But cold waxing doesn’t cause irritation or discomfort even on sensitive skin.
Less Redness

You just have to pull off the strips from your skin after the application. There’s no way you’ll get severe redness. Even for those with the most sensitive skin, there’s negligible probability of redness, that too for a very short time period.
Part 3: Cold Wax or Hot Wax for Hair Removal?
In this section, we’ll take a look at the comparison and differences between cold wax or hot wax for hair removal.
Cold Waxing
Application Method
You just have to apply cold waxing strips on the treatment area and remove them with a quick pull.
Pros & Cons
- No heating or special equipment is needed to do the treatment.
- You can get smooth and hairless skin in a nick of time.
- Since there’s a layer of adhesive on the strips, some people might not feel so good with the adhesive sticking to their skin.
- If you’ve got really thick and dense hair, this technique might not remove all the hair at once.
Hot Waxing
Application Method
You need to melt the wax before using it and then spread it all over the treatment area. Then it needs to be hardened before removing it with a piece of cloth or a paper strip.
Pros and Cons
- Since you’re spreading molten wax, which gets hardened before removing it, the wax creates a really nice and tight grip with the hair. Therefore, thick, dense, and coarse hair can be removed with this technique at one go.
- You need to heat the wax and that means you’ll need additional equipment to do the treatment.
- Since it’s hot wax that you’re going to spread on your skin, there’s a risk of burns if you don’t do the treatment properly.
Part 4: How to Use Cold Wax for Hair Removal?
Now that you’ve got an idea of various hair removal techniques that are similar to cold waxing, let us see how to use cold wax for hair removal at home.
Step 1: Preparation
1. Washing & Cleaning
You need to wash and clean the treatment area. You can use soap and water for washing, or it’s always best to do cold waxing just after taking a bath.
2. Checking the Hair Length
Experts suggest that the ideal hair length for cold waxing is 6mm to 12mm for getting the best results. While you don’t have to measure the length, you can just visually check if the hair length is within this range.
3. Patch Test
Just in case this is the first time you’re doing cold waxing all by yourself, you can do a patch test on a small area with one strip.
Step 2: Start to Wax
1. Warming Up
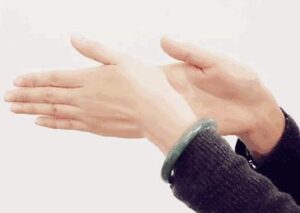
You can warm up the strips by rubbing it between your palms for a few seconds. This will soften the wax and will give better results.
2. Applying the Strip
Peel the strips and start applying them on the treatment area one by one in your hair growth direction. Keep pressing it with the other palm as you proceed to get better results. Let the adhesive and other ingredients do their magic. Let the strips on for a few seconds or maybe a minute or two.
3. Removal Process
Hold the skin taut with one hand near the end of the strip and pull it quickly with the other hand. This is the most expert way of keeping the pain at bay.
Step 3: Post-removal Care
1. Gentle Cleaning
After removing the strips, there can be leftover adhesive, wax, and other ingredients. You can use a soft piece of cloth to wipe off the leftovers.
2. Take Precautions

You need to avoid using hot water right after the treatment on the treated skin and avoid going out in the sun when it’s too bright.
Part 5: Tips for a Successful Cold Waxing Experience
- Most people lack the skills of pulling the strips quickly. A quick pull is a must to get the most optimum results.
- Holding the skin before removing the strips is very important, or it can be really discomforting when you pull the strip with force.
- You need to avoid treating the same area repeatedly. If you think that the first try wasn’t a success, you can reapply the same strip on the same area again. But don’t go for the third round immediately.
Conclusion
So far you’ve learned everything that you need to know about cold waxing. After the end of this article, you should be confident enough to do cold waxing at home all by yourself. Remember that with practice and experience, you’ll eventually get better at this. While the task is easy, you should still read all the user manuals and try watching a video if you’re still not sure how to do it the right way.

 By myulikeadmin
