 By myulikeadmin
A perfect eyebrow makes a lot of difference and contributes to your wonderful look, which is why all the girls are crazy about it. However, the key to symmetrical eyebrows is eyebrow mapping. It’s a technique, through which, you map your eyebrows on your face to suit your face type and mood.
Eyebrow mapping is also important because it will help you get a perfect balance of your facial appearance and help your eyes get a perfect shape. In this article, we will explain to you how to do eyebrow mapping step by step the right way, what are different eyebrow mapping tools, and some illustrations of before and after eyebrow mapping guides.
Table of Contents:
- Part 1: What Is Eyebrow Mapping?
- Part 2: Eyebrow Mapping Tool
- Part 3: How to Do Eyebrow Mapping?
- Part 4: Adjusting Eyebrow Mapping for Individual Features
- Part 5: Before and After Eyebrow Mapping
Part 1: What Is Eyebrow Mapping?
In order to shape your natural eyebrows in a different way such as funky mood, angry mode, playful appearance, youthful touch, etc., you can go for eyebrow mapping. It’s a cosmetic process that is all about perfect art, creativity, a little bit of geometry, and your imagination skills.
To do the eyebrow mapping the right way, you’ll need a few tools that will help you mark the key points on your face. Once you mark these key points, you can draw the lines for your eyebrows correctly.
Precision & Symmetry
A perfect eyebrow mapping is something that goes well with your face shape, color, eye shape, and your mood. Depending on what event you’re attending, you may map your eyebrows to suit that event.
Furthermore, the level of precision and symmetry in your eyebrow mapping must be well-balanced, or else one eyebrow will appear asymmetrical to the other one, and that can make your face appear funny or unappealing.
Part 2: Eyebrow Mapping Tool
Ruler
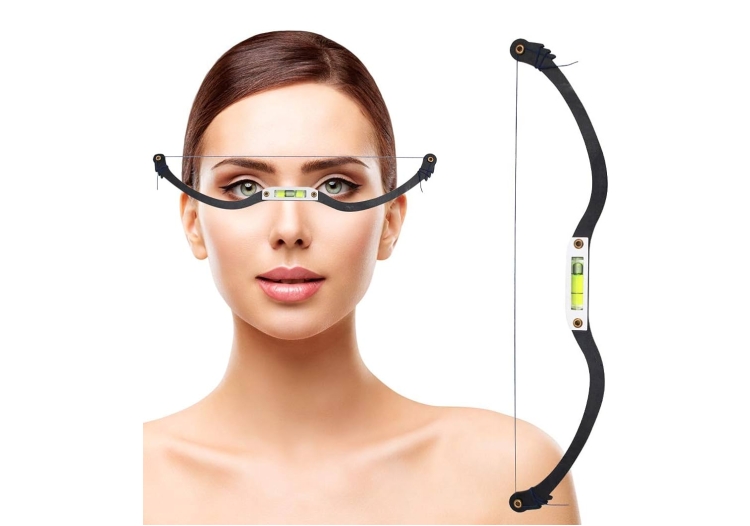
You need to use a ruler to mark the key points for your eyebrows. We recommend a ruler because it’ll help you measure the distance between each key point, which will help you get more accurate eyebrow shaping.
You may use any regular ruler from a stationary (the small one), but if you want to go more professional, then some cosmetics shops sell rulers that are designed especially for eyebrow mapping.
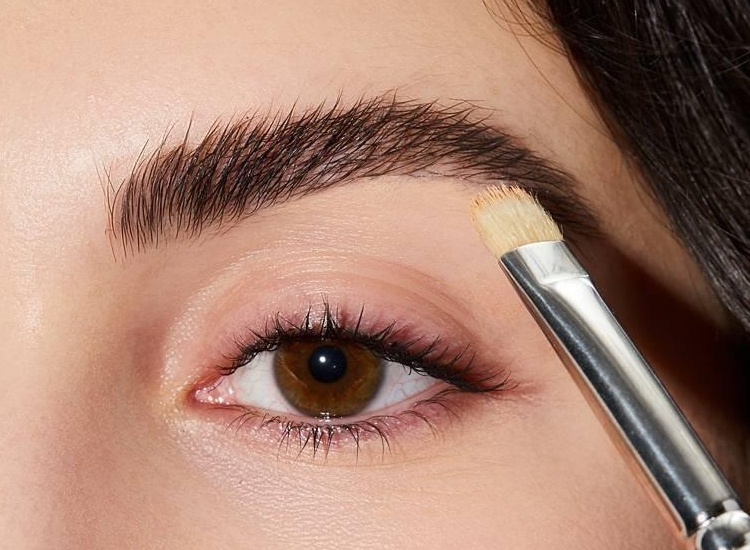
Eyebrow Pencil
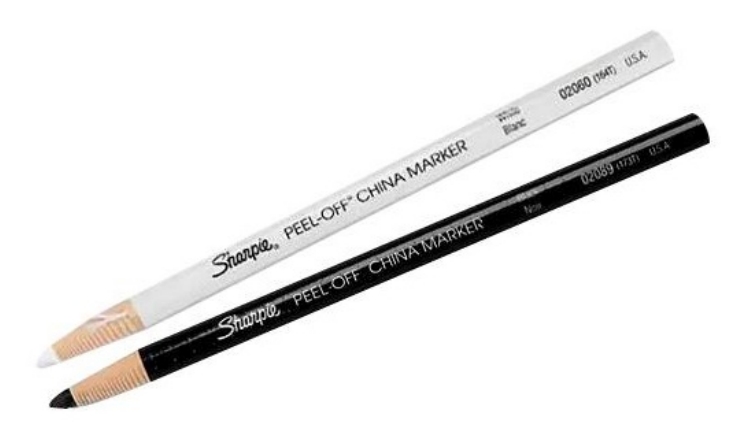
An eyebrow pencil is what you will be using to mark the points, draw the lines, and fill up the shapes as needed. These are not the ones you use on a paper.
These eyebrow pencils are safe for the skin and come in a variety of colors. If you want an even more dramatic look, you can combine different colors as you want.
Spoolie Brush
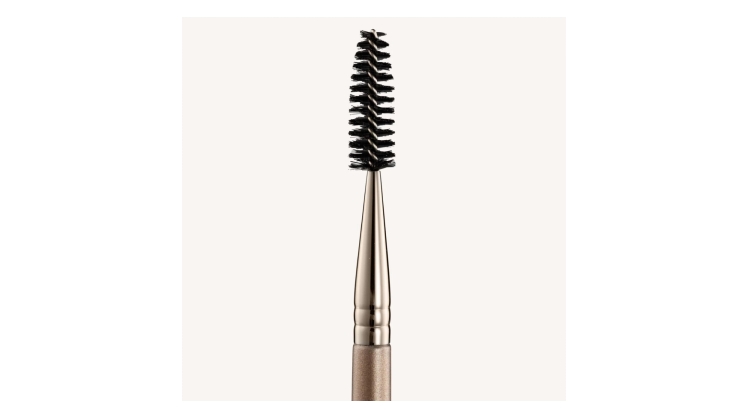
A spoolie brush is used to brush our eyebrows. This tool is important because you need to brush your eyebrows, so they look more beautiful. Also, if there is any hair that needs to be trimmed, a spoolie brush will reveal such eyebrow hair.
Concealer
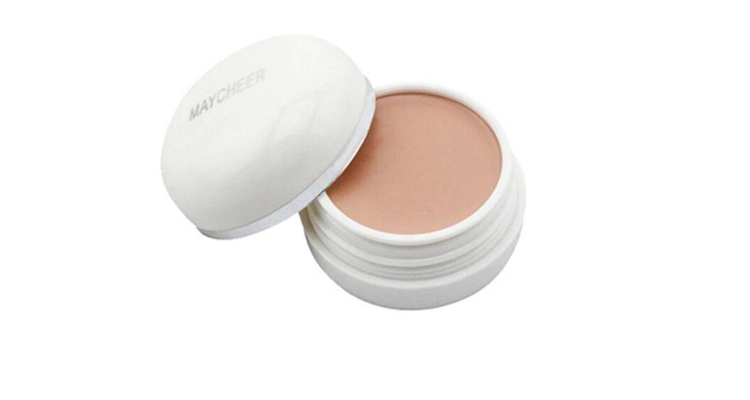
A concealer is like an outliner, that will help you get even crispier eyebrows. You can apply a concealer around your eyebrows so that they stand out. Many women use this tool to get a bolder and sexier look.
Eyebrow Stencils
If you’re totally new to eyebrow mapping, making mistakes is very common and easy. So, you can use ready-to-use eyebrow stencils that come in a variety of shapes. Just place the stencil over your eyebrows and use a pencil to draw the eyebrows. This is just like using any regular stencil on a piece of paper to draw different shapes.
Stencils are one of the easiest and quickest ways to do error-free eyebrow mapping. Girls who use this tool often have a collection of dozens of stencil shapes.
Part 3: How to Do Eyebrow Mapping?
Materials You’ll Need
- Eyebrow mapping ruler
- Eyebrow pencil
- Spoolie brush
- Mirror
1. Preparation
- Gather all the materials and tools that you’ll need. It’s better to have everything ready beforehand.
- Make sure that your workspace is ready for use. Clean up the mirrors and keep the lighting optimal (neither too bright nor too dark).
2. Find The Key Points
- Let’s begin with your left eyebrow first. Now, use your ruler and put it vertically on your face alongside your nose, because that’s the starting point of the eyebrows in most cases. Now use your eyebrow pencil to mark down the starting point.
- To locate your eyebrow’s arch, pivot your ruler from the side of your nose so that it runs across the middle of your eye. Now you can mark down this point as well. This point will tell you the highest height of your eyebrow’s arch.
- Keep pivoting your ruler and reach the end of your eye. Now mark down this point, which will tell you the ending point of your eyebrow.
3. Draw The Lines
- Now that you’ve got the key points, you just have to use your pencil and draw the lines to connect those points. If you need to draw straight lines, it’s better to use a ruler so you don’t mess things up.
4. Map The Bottom Line
- Keep connecting the dots and you will get the bottom line of your eyebrow. Just remember to keep using your artistic skills, creativity, and imagination, so your eyebrow shape stands out.
5. Repeat The Process
- Once you complete the left eyebrow, repeat the same process for your right eyebrow.
6. Combing & Adjustments
- This is where you will use your spoolie brush. Brush your eyebrows so that all the stray hair becomes visible.
- Trim any stray hair and make sure that no hair is long enough to run out of your eyebrows.
- Visually check whether or not your eyebrows are consistent and symmetrical. Make any adjustments that you need to do at this stage.
7. Finishing Up
- If you’re happy with the shape, then you can fill up your eyebrows now.
Tips to Get the Desired Eyebrow Shape
- Remember that the same eyebrow shape won’t look good on every face. If you found a cool shape in a fashion magazine, make sure that your face shape is suited for that shape before trying it out.
- Novices can consult a beautician about the right shapes and colors that would fit their faces.
- Don’t over-pluck your brow hair, because that will give you thin and unnatural eyebrows.
- Avoid going for cheap products for your eyebrow mapping. Even if the quality products might be costlier, we still recommend them.
- Be slow and steady when mapping the eyebrows. Never mark the key points in a hurry because you need to do a lot of calculations when marking them.
- Any miscalculations when making the arch and drawing the lines can result in inconsistent and asymmetrical eyebrows. Make sure to spend some time to visually check for the correctness of both brows.
Part 4: Adjusting Eyebrow Mapping for Individual Features
Consider Your Face Shape
- Oval Face: Soft, angled brows work well.
- Round Face: High-arched brows add definition.
- Square Face: Soft angles and a slightly longer brow are flattering.
- Heart-Shaped Face: Soft arches and a shorter tail create balance.
- Long Face: Straight-across or gently arched brows can visually shorten the face.
Analyze Eye Shape
- Almond Eyes: Most brow shapes complement almond eyes.
- Round Eyes: High arches will add definition.
- Hooded Eyes: Slightly lifted and elongated brows can make the eyes appear more open.
- Deep-Set Eyes: Brows that follow the natural shape work well.
Personal Style Matter
- Bold and Dramatic: High-arched and well-defined brows.
- Natural and Subtle: Soft angles and minimal shaping.
- Classic and Timeless: Balanced, medium-arched brows.
- Trendy and Edgy: Experiment with various shapes, such as straight-across or high-arched brows.
Part 5: Before and After Eyebrow Mapping
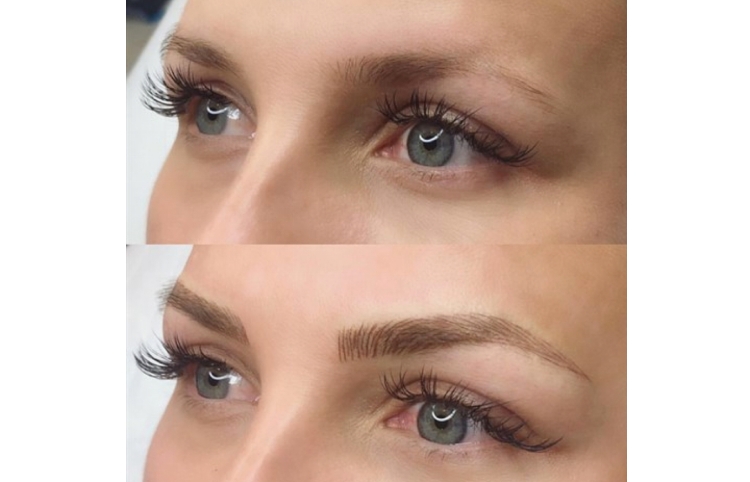
Some Cool Eyebrow Mapping Ideas
1. Soft Angled Brows
- Ideal for oval or heart-shaped faces.
- A gentle, soft arch complements natural curves.
- Suitable for those who prefer a subtle, classic look.
2. High-Arched Brows
- Adds drama and definition to the eyes.
- Suits round or deep-set eyes.
- Great for those who want bold, expressive brows.
3. Straight-Across Brows
- A trendy choice for an edgy look.
- Works well with almond or hooded eyes.
- Ideal for those with a fashion-forward style.
4. Balanced Medium Arches
- Suits most face shapes and eye types.
- Offers a timeless and versatile look.
- Perfect for those who appreciate classic beauty.
5. Slight Lifted Brows
- Aids in opening up hooded or droopy eyes.
- Provides a more youthful appearance.
- Ideal for individuals seeking a refreshed look.
6. Well-Defined Natural Brows
- Emphasizes your brows’ natural shape.
- Suitable for those who prefer a minimalistic, everyday look.
- Works well for individuals who want to enhance rather than transform.
7. Angled Medium Brows
- Combines soft angles with a medium arch.
- Adds some definition without being overly dramatic.
- Versatile for various face shapes and personal styles.
8. Thick and Bold Brows
- Enhances thick eyebrows, accentuating their fullness.
- Ideal for those who love bold, statement brows.
- Well-suited for making a dramatic impact.
Conclusion
So far you’ve got an idea of what eyebrow mapping is and what role it plays in enhancing your overall appearance. If you’ve never got your eyebrows mapped, maybe this is the right time. We recommend getting your eyebrows done by a good professional for the first time and seeing for yourself what wonders it can do to your face.
Finally, remember that not all shapes are for everyone. No matter how tempting a brow shape looks on your favorite celebrity, do an analysis to see if it really suits your face and eye shape.