 By ULIKEBEAUTY
 July 4, 2024
 7 minutes


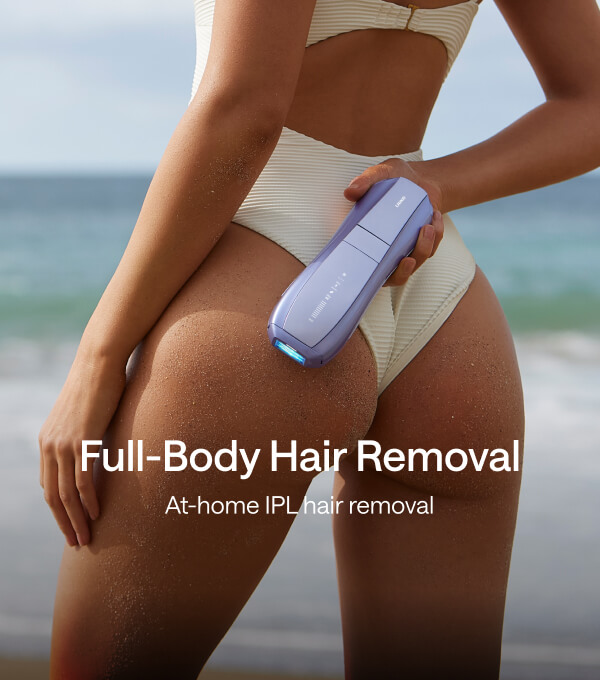
Knowing how to use the Ulike Air 10 IPL Hair Removal Device as intended by the great minds behind the device will guarantee the best hair removal results. Being the current most powerful IPL hair removal handset in the market with dual light to eliminate even the toughest hair, it’s worth understanding how this IPL device works.
Ensuring every feature and treatment mode of the at-home Ulike Air 10 Hair Removal Device is set to deliver maximum energy output is paramount to achieving intended results within the shortest time possible. Keep reading to learn the IPL working principle. It’ll help you remove unwanted hair from your body.
Before you learn how to properly use the Ulike Air 10, what’s included in the packaging and why?
Table of Contents:
Unboxing the Ulike Air 10 IPL Hair Removal Device
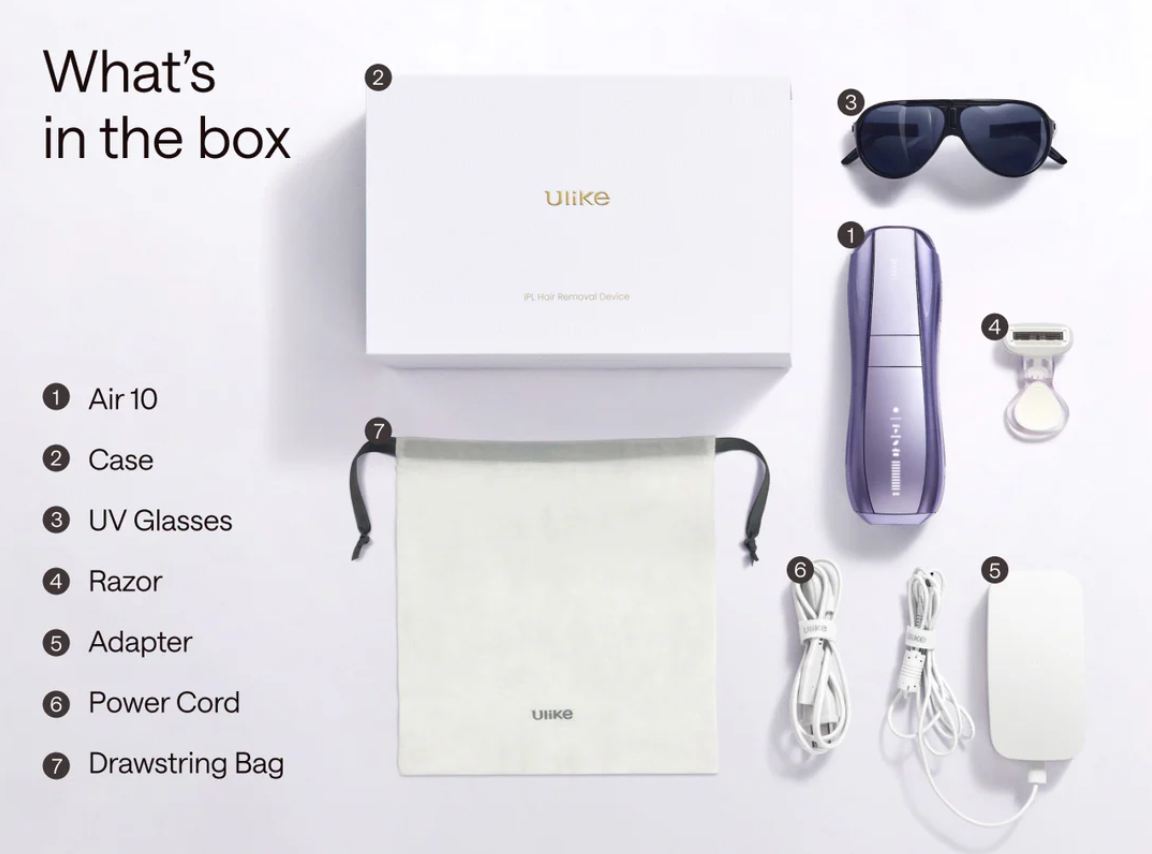
The Ulike Air 10 is the device you need to tackle the disgusting hair on your body. It comes with all the necessary items you need to remove hair effortlessly and nearly painlessly. And like the Air 10 predecessors, you’ll find hair removal pre-treatment tools such as a razor for shaving.
 Upon ordering the new Ulike Air 10, the beautifully designed velvety white box bearing the Ulike brand name on it. The “Ulike” name embossed on the entire box in an interesting pattern makes the packaging worth giving to your boyfriend, father, or girlfriend as a present.
Here’s what you’ll find when unboxing the Ulike Air 10.
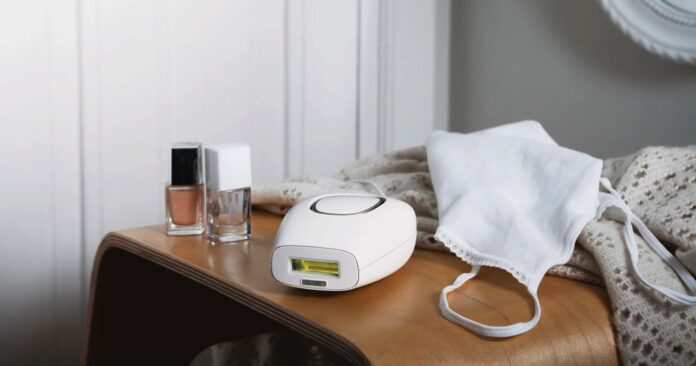
- The Ulike Air 10 device – The main item in the box is the hair removal handset – Ulike Air 10. The ergonomics deployed on this product make it convenient to handle and not tiring on small palms. Every feature on this IPL device requires no training or an expert to understand.
- Adapter and Power Cord – Before starting to use the Ulike Air 10, the device has to be connected to a power source. So that you don’t incur extra costs purchasing an adapter, the Ulike company has included an adapter and power cord in the box. With good maintenance and care expect the adapter and power cord to last many years.
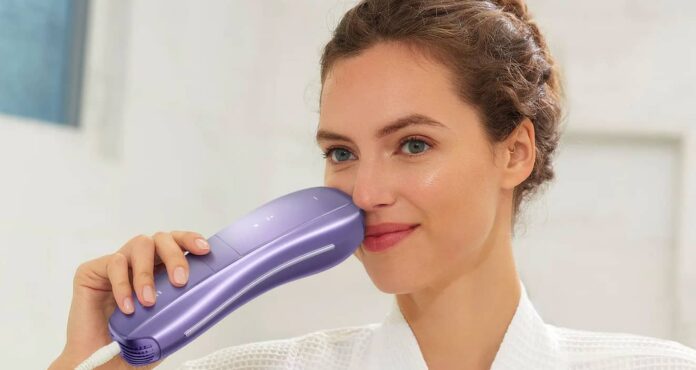
- Protective Eyeglasses – When doing hair removal on your face, you’ll need protective glasses to protect your eyes from the pulses of intense light. Even though the effects of the IPL pulse light are minimal and rare to the eyes, the National Library of Medicine asserts this light can cause pain and other eye infections. Wear the protective eyeglasses in the box before starting to remove from the face.
- Mini-Razor – To ensure the light beam concentrates on the hair roots and destroys them, you’ll need to shave before starting the hair removal process. Again, During IPL hair removal long hairs absorb the light energy thereby preventing it from reaching hair follicles. And that’s why the manufacturer has included a mini-razor to shave the unwanted hair.
Understanding Ulike Air 10 IPL Handset
The Ulike Air 10 has several functions that you need to know first. The body area and skin response to the emitted pulse light determine which function to switch on.
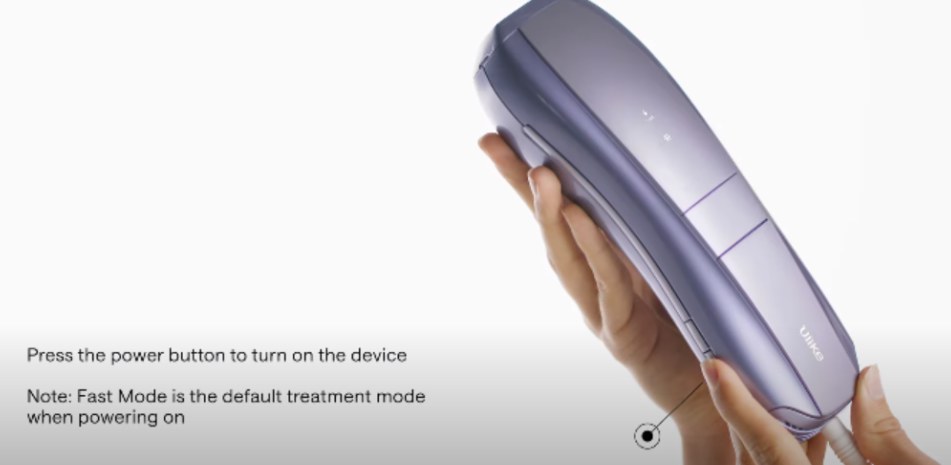
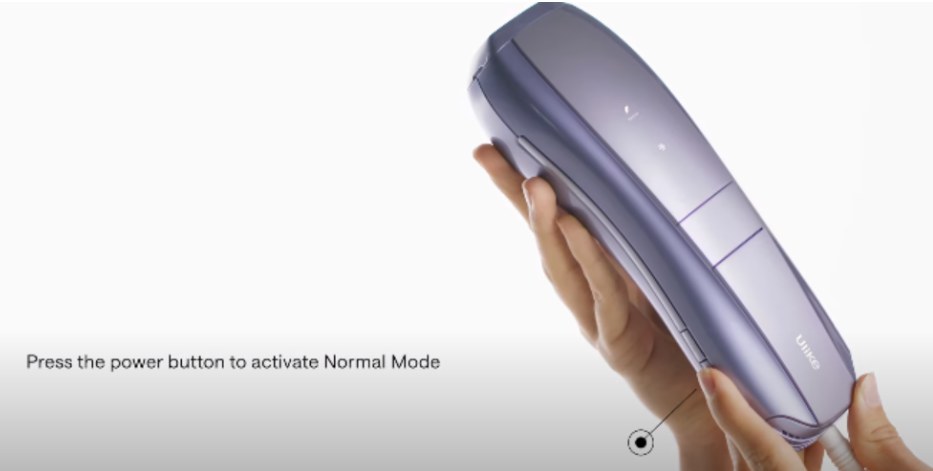
To start using this device, switch on the device by pressing the power button shown below. Immediately you power on, the Fast Mode will be the default function.
To activate the Normal Mode, press the power button again. If you’ve got thick and coarse hair, press the button again to activate the High Mode.
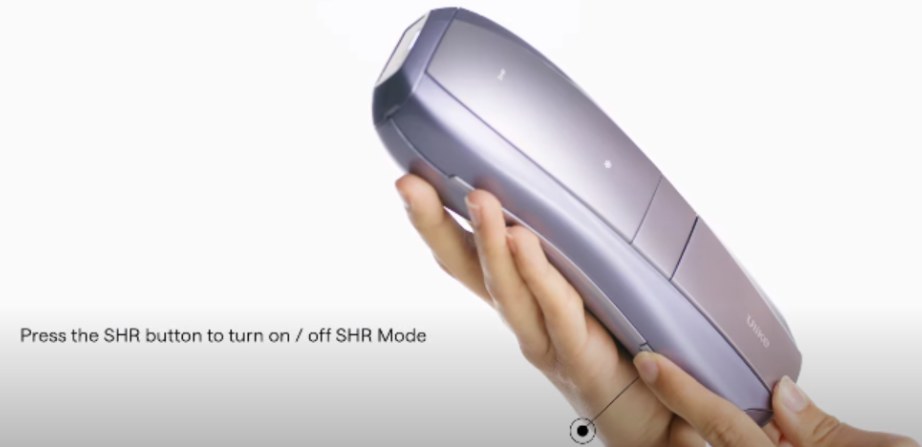
If you’ve got stubborn hair and you need to remove it, press the button next to the power button to activate the SHR Mode. Using this button, you can turn on/off the SHR Mode.
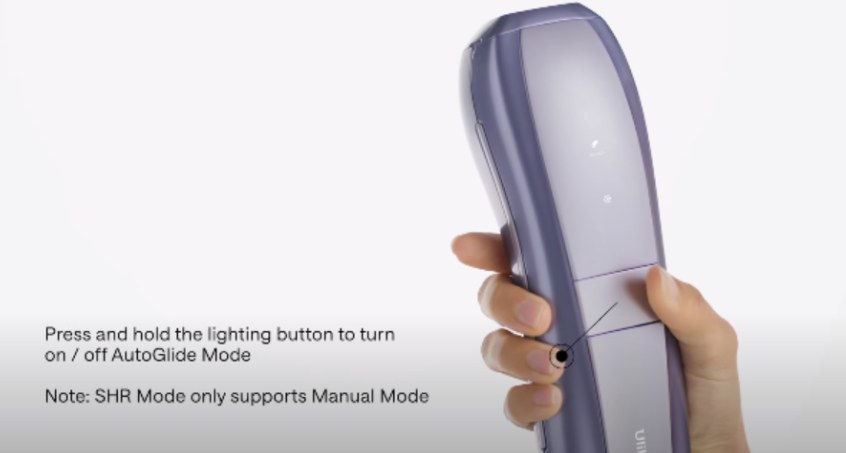
For hair removal on large body parts, you need an auto-glide mode. The Ulike Air 10 has an AutoGlide Mode that’s activated by pressing the large button on the front. Remember, this mode doesn’t work with the SHR Mode.
When you power on this hair removal device, the SkinSensor is activated. This feature detects the skin tone and automatically adjusts the intensity of pulse light thus preventing skin burn.
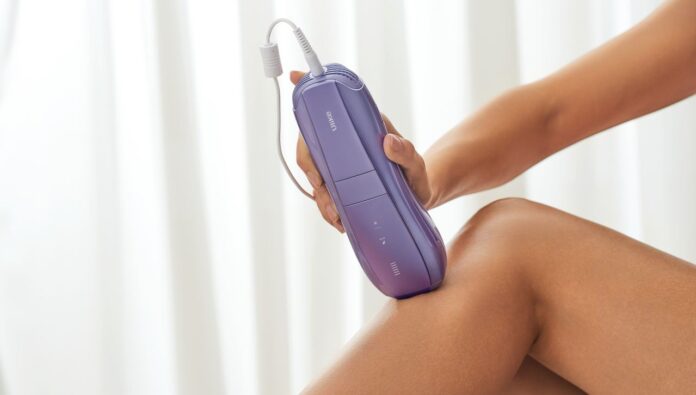
Note: When gliding on your skin, ensure the light window is in full contact with the skin.
How to Use Ulike Air 10 IPL Hair Removal Device
The Ulike Air 10 IPL Hair Removal Handset is an at-home IPL device that uses IPL (Intense Pulse Light) to destroy the hair follicles thus retarding hair growth. Your skin color and hair color contrast determines the device’s effectiveness.
Using IPL hair removal alternative methods like shaving, waxing, hair removal creams, or epilation is easy, simple, and temporary but the side effects are adverse. In this section, we’ll take you step-by-step through the best way to use Ulike Air 10 IPL Hair Removal Device for maximum and long-lasting results.
Step 1: Read The Use Manual Carefully
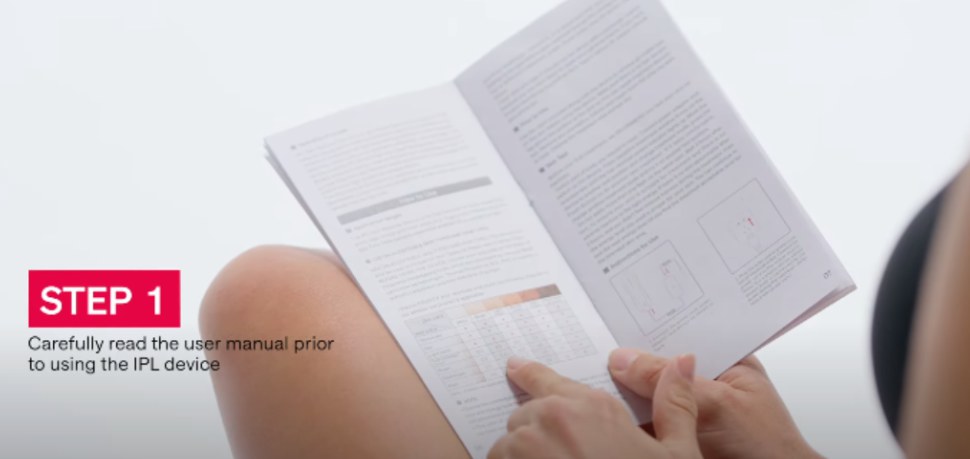
To know whether the Ulike Air 10 will work on you depending on your skin tone and hair color read the user manual included in the box. You’ll also find the Dos and DON’Ts when using this device in the user manual and an in-depth guide on how to use the device effectively at home.
Step 2: Shave Hair on Areas To Treat
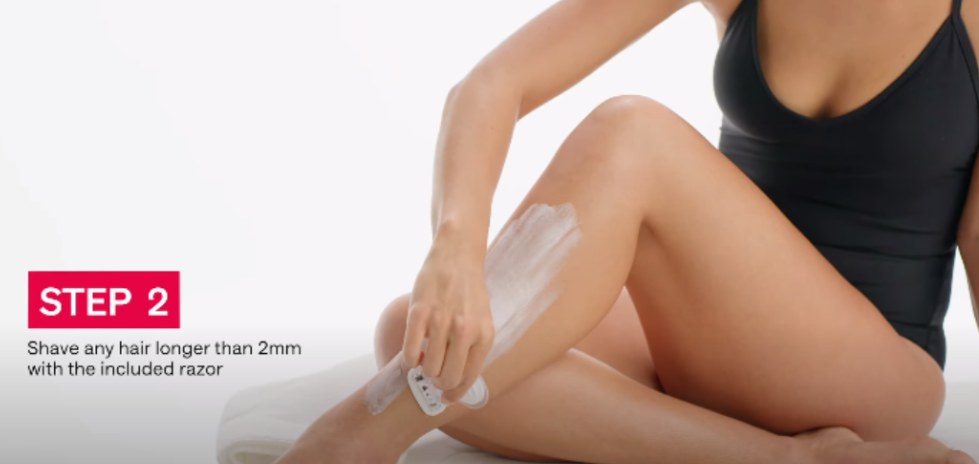
As said earlier, you’ll need to shave hair on the areas where you want to remove hair. This helps achieve better results without feeling much pain. When the hair is long, it’ll absorb more light energy and there’ll be chances of feeling a burning sensation. Use the mini-razor to ensure the hair is not longer than 2mm.
After shaving, clean and wipe the area until it’s completely dry.
Step 3: Connect The Ulike Air 10 To Power Supply
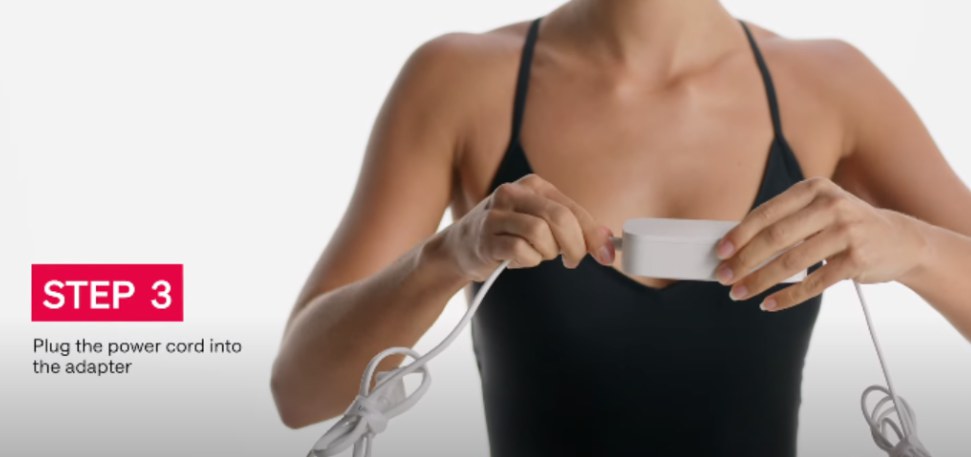
This device relies on a direct power supply to function. It’s electric corded. Plug the power code into the adapter.
Step 4: Connect the Adapter to the Ulike Air 10
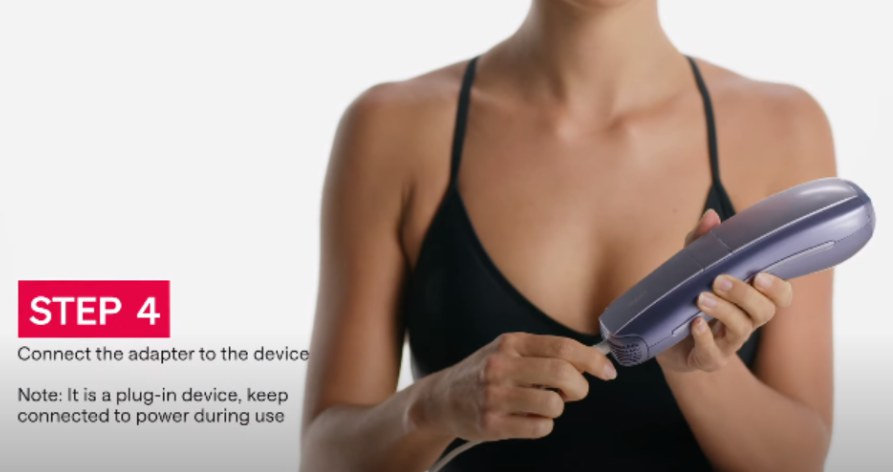
After connecting the power code to the adapter, plug the power adapter into the power socket then connect it with Ulike Air 10. Keep the device connected to a power source when using it.
Step 5: Turn On the Device
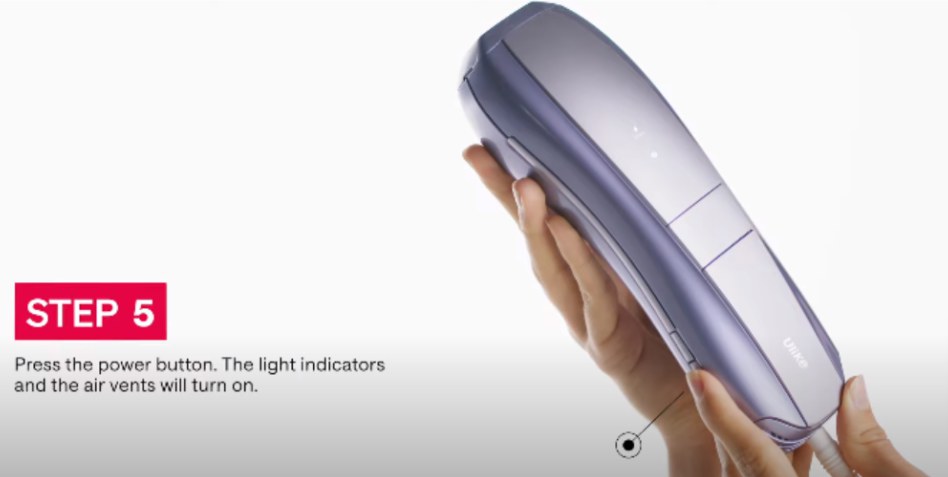
To turn on the Ulike Air 10, press the power button for like 2 seconds and release the button. Once it’s on, you’ll see the light indicators and the air vents turn on.
Step 6: Check WhetherThe Device is Functioning
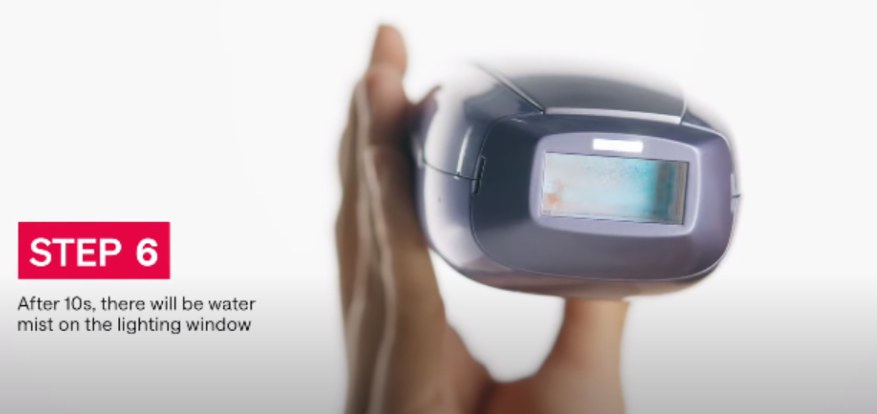
After turning this device on, the light indicators will be the first feature to show the device has power and is turned on. If the air vents are functioning as required, you’ll see water mist on the light window; an indication the device is ready to start emitting light pulses.
Step 7: Wear Goggles
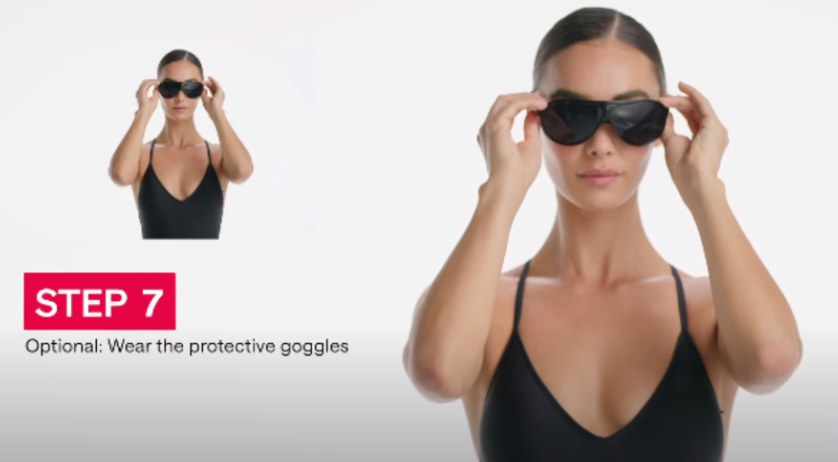
Inside the box is a UV eye protective goggles. Wear the goggles before starting to remove hair. Remember the Ulike Air 10 has double light so the light flashes will be intense especially when treating the face.
Step 8: Do a Patch Test
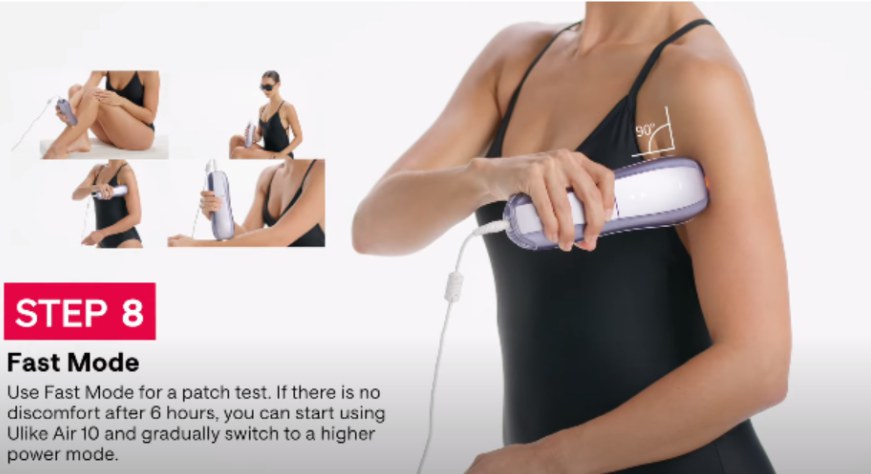
Not every hair removal device will work on your skin without leaving negative results. To avoid negative after-hair removal results, do a patch test, and if nothing negative can be witnessed or felt, get on with your hair removal process. We recommend using the Fast Mode when doing a patch test.
Ulike Air 10 has different hair treatment modes.
Normal Mode
Once you’ve tested the device, press the power button to activate the Normal Mode. With this Mode, you can safely tackle the hair on your legs and arms effectively. It produces single light energy flashes which best tackles fine to normal hair.
High Mode
You’ll have to press the power button severally to activate the High Mode. You’ll see an indicator light on the device’s front side once the mode is active. This mode produces two flashes of light thus resulting in high energy pulses. If you’ve got on your chest or underarms, this is the best mode to use.
SHR Mode
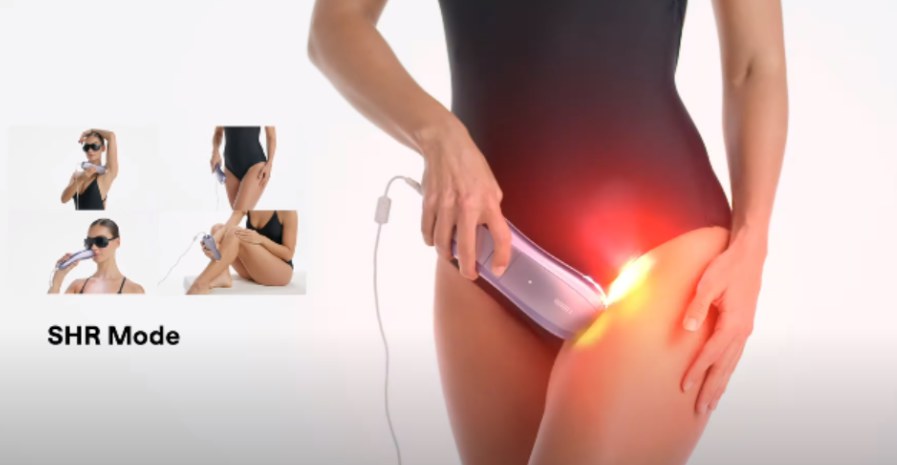
The SHR Mode is highly powerful as it produces four energy pulses with each flash. This mode eliminates all the stubborn hair on your body.
Step 9: Turn Off Device
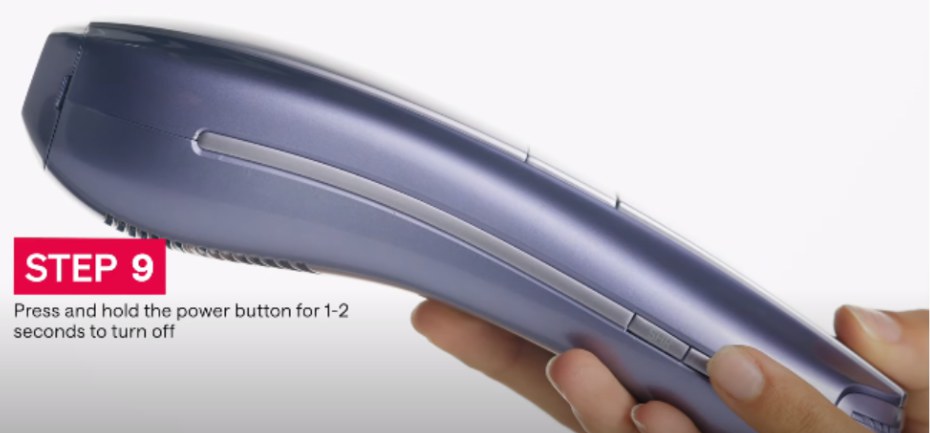
After you’re done with hair removal, press and hold the power button for 1-2 seconds to turn off the device.
Step 10: Clean Device After Use
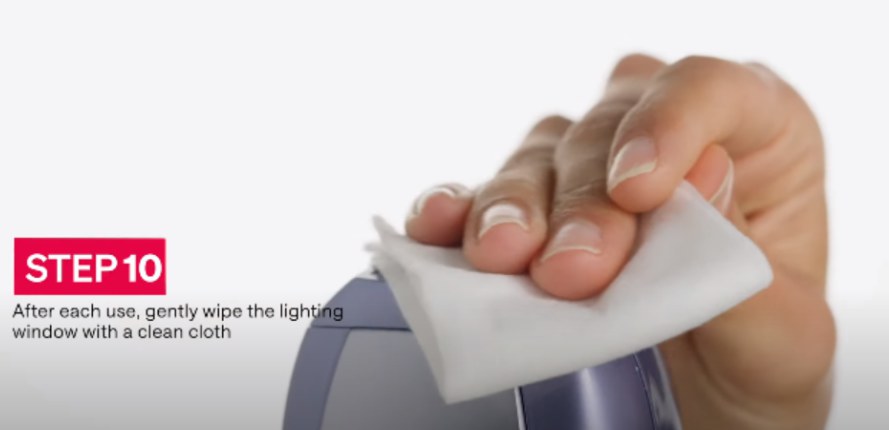
You should ensure the light window is clean before keeping it in the storage box. To clean the light window after use, wipe it with a clean dry cloth.
After using the Ulike Air 10, it’s good to hydrate the skin on the areas you’ve treated.
For the first 1-4 weeks, use this at-home IPL device 3 times a week for better results. From the 5th week, use it once or twice every month to maintain hair growth.
Conclusion
The Ulike Air 10 IPL Hair Removal Device is easy to use, achieves results fast, and has no side effects. This is only possible when you know how to use it properly. It has many different features that ensure your skin is hair-free for a longer period. To distinguish it from the laser hair removal devices, the Ulike Air 10 has a Sapphire Ice Cooling feature to ensure the treatment process is nearly painless.
From week 1 to week 4, it’s recommended to use the Ulike IPL hair removal device three times per week. From week 5 onwards, adjust the hair removal schedule to 1-2 maintenance sessions per month based on your hair growth. It is advised to avoid exposing the treated areas to direct sunlight for at least 48 hours before and after the treatment.
It’s important to read the user manual carefully before use and follow the instructions closely to avoid any potential risks.